Imagine a world in which you can easily and effortlessly grow your own fresh herbs right in the comfort of your own home. Well, that dream is now a reality with the simple act of sprouting dill seeds. Whether you’re a seasoned gardener or just starting out, sprouting dill seeds is a fun and rewarding experience that will not only enhance your culinary creations but also add a touch of freshness to your life. In this article, we will explore the joys of sprouting dill seeds and uncover the many benefits that come along with it. From learning about the ideal conditions for sprouting to discovering creative ways to incorporate dill into your everyday meals, get ready to embark on a journey of herb-growing bliss.

Choosing the Right Dill Seeds
Purchasing Quality Dill Seeds
When it comes to sprouting dill seeds, selecting the right seeds is of utmost importance. To ensure a successful sprouting process, it is crucial to purchase high-quality dill seeds from a reputable source. Look for seeds that are fresh, plump, and free from any signs of damage or disease.
Selecting the Right Variety
Dill comes in various varieties, each with its own unique flavor profile and growth characteristics. As you choose dill seeds, consider the purpose for which you plan to use the herb. If you primarily intend to use dill for culinary purposes, varieties such as Bouquet or Fernleaf are excellent choices due to their strong and aromatic flavor. On the other hand, if you are growing dill for its decorative purposes, varieties like Mammoth or Mammoth Long Island will provide robust and attractive foliage.
Preparing the Sprouting Environment
Choosing the Right Soil
The soil you choose for sprouting dill seeds plays a critical role in the success of your sprouting endeavors. Dill prefers well-draining soil rich in organic matter. A good choice for sprouting dill is a lightweight potting mix specifically designed for seed starting or a blend of equal parts compost, sand, and perlite. Ensure that the soil is moist but not waterlogged, as excessive moisture can lead to rotting of the seeds.
Providing Adequate Light
Dill seeds require ample light for successful sprouting. Place your sprouting container in a location that receives at least 6 to 8 hours of direct sunlight each day. If you do not have access to sufficient sunlight, you can opt for fluorescent grow lights placed 6 to 8 inches above the sprouting container. Regularly monitor the light intensity and adjust the light source’s height accordingly to ensure optimal growth.
Determining Optimal Temperature
Dill seeds thrive in moderate temperatures, typically between 60°F and 70°F (15°C to 21°C). To maintain the ideal temperature for sprouting, it is beneficial to use a seedling heat mat or a warm location in your home. The warmth will promote germination and accelerate the growth of your dill seedlings. Avoid exposing the seeds to extreme temperature fluctuations, as this can hinder their ability to sprout.
Ensuring Proper Moisture Levels
Consistent moisture levels are crucial for dill seed sprouting. Ensure that the soil is consistently moist, but not saturated. Overwatering can lead to fungal diseases, while underwatering can prevent successful germination. Prioritize misting the seeds with a spray bottle to avoid disturbing the delicate seeds. Regularly monitor the moisture levels and adjust watering as needed to maintain the optimal growing conditions for your dill seeds.

Soaking Dill Seeds
Why Soak Dill Seeds?
Soaking dill seeds before germination helps to soften the seed coat and encourage quicker and more uniform sprouting. This process is particularly beneficial for dill seeds, as their hard outer shells can inhibit water absorption. By soaking the seeds, you ensure that water penetrates the shells, enabling the seeds to germinate more effectively.
Recommended Soaking Time
To soak dill seeds, simply place them in a container and cover them with room temperature water. Allow the seeds to soak for approximately 24 to 48 hours. This timeframe gives the seeds ample time to absorb water and initiate the germination process. After soaking, drain the water and proceed with the germination process.
Germinating Dill Seeds
Preparing the Soil for Germination
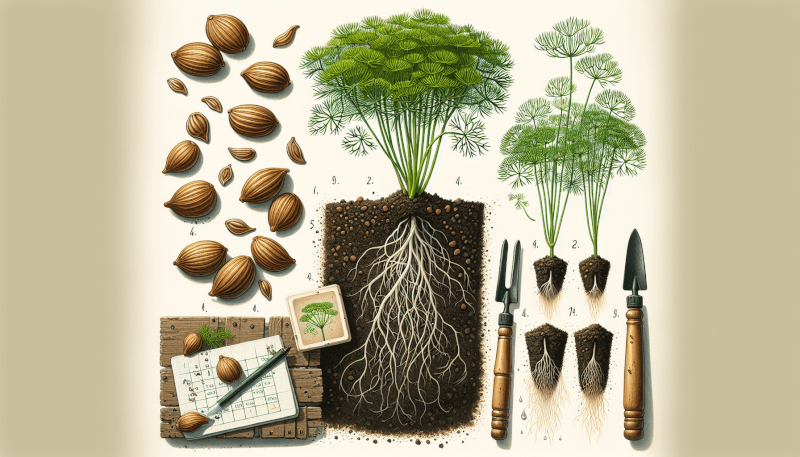
Before sowing your soaked dill seeds, ensure that the soil in your sprouting container is adequately prepared. Use a small gardening tool, such as a trowel or your fingers, to create small depressions in the soil. These depressions should be approximately one-fourth to one-half inch deep. Creating indentations in the soil will provide a suitable environment for the seeds to establish their roots and sprout.
Sowing Dill Seeds
Once the soil is prepared, carefully place the soaked dill seeds in the indentations you created earlier. Ensure that the seeds are spaced approximately one inch apart. Gently press the seeds into the soil to make good contact with the moist soil, but avoid burying them too deep.
Covering and Watering the Seeds
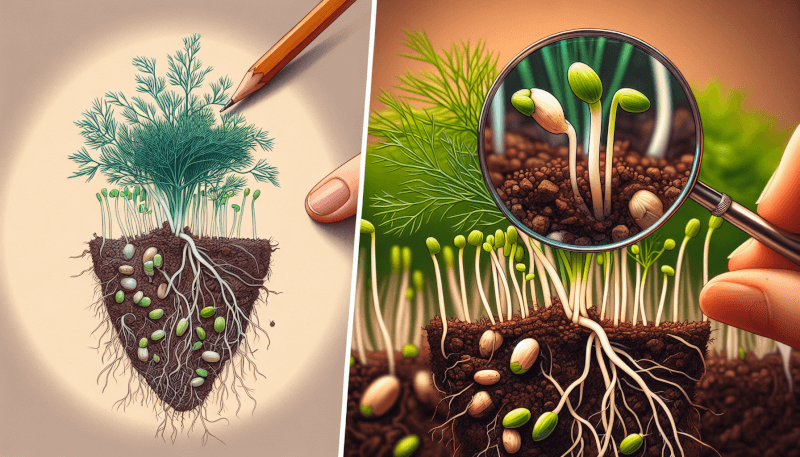
After sowing the dill seeds, cover them lightly with a thin layer of soil or vermiculite. This layer will help to retain moisture and provide a conducive environment for germination. Be cautious not to bury the seeds too deeply, as this can impede their ability to sprout. Once covered, mist the soil gently with water or use a fine spray to avoid displacing the seeds.
Maintaining Proper Moisture
To ensure successful germination, it is essential to maintain consistent moisture levels in the soil. Regularly monitor the moisture content and mist the soil as needed to keep it consistently damp. Avoid overwatering, as this can lead to rotting of the seeds. With proper care and attention to moisture levels, you will soon witness the emergence of your dill seedlings.

Caring for Dill Seedlings
Providing Ample Light
As your dill seedlings emerge, they require ample light to grow and develop into healthy plants. Place the sprouting container in a location that receives at least 8 to 10 hours of direct sunlight daily. If natural sunlight is insufficient, supplement it with a fluorescent grow light positioned 6 to 8 inches above the seedlings. Regularly rotate the container to ensure even exposure to light and prevent uneven growth.
Watering Seedlings
Proper watering is crucial for the growth and health of your dill seedlings. Ensure that the soil remains consistently moist but not waterlogged. Water the dill seedlings at the base, avoiding overhead watering that may lead to fungal diseases. Allow the soil to dry slightly between each watering to prevent root rot. Monitor the moisture levels regularly and adjust your watering schedule accordingly.
Fertilizing Seedlings
To support the healthy growth of your dill seedlings, it is beneficial to fertilize them periodically. Begin fertilizing when the seedlings have developed their first set of true leaves, typically around three to four weeks after germination. Use a balanced, water-soluble fertilizer diluted to half the recommended strength. Apply the fertilizer every two weeks, following the package instructions. Be cautious not to overfertilize, as excessive nutrients can negatively impact the flavor and aroma of the dill leaves.
Transplanting Seedlings
Once your dill seedlings have grown to a suitable size and the risk of frost has passed, you can consider transplanting them into larger containers or your garden. Choose a location with full sun and well-draining soil. Carefully remove the seedlings from the sprouting container, maintaining their root system’s integrity. Dig a hole in the new location and transplant the seedling, ensuring that the soil level matches the original planting depth. Water the transplanted seedlings thoroughly to help them establish in their new environment.
Troubleshooting Common Issues
Seed Fungus or Mold Growth
If you notice fungal growth or mold on your dill seeds, it is important to take immediate action to prevent further damage. Remove any affected seeds or seedlings and adjust the growing conditions to discourage fungal growth. Ensure that the sprouting environment has good air circulation, avoid overwatering, and maintain proper moisture levels. Consider treating the remaining seeds with a fungicidal solution to eliminate any potential pathogens before germination.
Yellowing or Wilting Seedlings
Yellowing or wilting seedlings can be a sign of various issues, including nutrient deficiencies, overwatering, or inadequate light. To address these problems, evaluate your growing conditions. Adjust watering practices, ensuring that the soil remains consistently moist but not waterlogged. Provide sufficient light by relocating the seedlings to a brighter location or supplementing with artificial lighting. If nutrient deficiencies are suspected, consider applying a balanced fertilizer diluted to the recommended strength.
Pest Infestation
Pests such as aphids, caterpillars, or spider mites can pose a threat to your dill seedlings. Monitor your plants regularly for any signs of pest infestation, including yellowing leaves, distorted growth, or the presence of pests themselves. If pests are detected, use appropriate organic pest control methods such as insecticidal soap or neem oil. Follow the product instructions carefully and apply treatments when the pests are most vulnerable, typically in the early morning or evening.

Harvesting Dill
Determining When to Harvest
Harvesting dill leaves and seeds at the right time is crucial to maximize their flavor and fragrance. Dill leaves can be harvested as soon as the plant reaches approximately 6 inches in height. Harvest the leaves in the morning before the sun gets too hot. Dill seeds, on the other hand, should be harvested when the flowers have turned into brown seed heads but before the seeds begin to scatter. This is typically around 80 to 90 days after sowing.
Methods for Harvesting Dill
To harvest dill leaves, simply snip the desired amount of leaves with clean garden scissors or shears. Aim to remove only a third of the plant’s foliage, allowing the plant to continue producing more leaves. For harvesting dill seeds, cut the seed heads when they have turned brown but before they start to shatter. Place a paper bag around the seed head and gently tap it, causing the seeds to fall into the bag. Store the harvested dill leaves and seeds properl4y to maintain their freshness and flavor.
Storing and Using Fresh Dill
Proper Storage Techniques
To prolong the freshness of your harvested dill, it is important to store it properly. For dill leaves, trim the ends and place them in a glass of water like a bouquet. Cover the leaves with a plastic bag and store them in the refrigerator. Change the water every few days to keep the leaves hydrated. Dill seeds can be stored in an airtight container in a cool, dark place, such as a pantry or spice cabinet, for up to six months. Ensure that the container is tightly sealed to prevent moisture and air from affecting the seeds’ quality.
Creative Ways to Use Fresh Dill
Fresh dill is an incredibly versatile herb that adds a delightful flavor and aroma to various dishes. Use it to enhance the taste of your homemade pickles, seafood dishes, salads, dressings, and sauces. Sprinkle chopped dill leaves on top of roasted vegetables or mix them into creamy dips for a burst of freshness. Additionally, fresh dill can be infused into oils or vinegars to create unique flavor combinations. Let your culinary creativity guide you as you explore the numerous ways fresh dill can elevate your dishes.

Alternative Uses for Dill Seeds
Dill Seeds as a Culinary Spice
While dill leaves are commonly used in cooking, dill seeds can also impart a distinct and robust flavor to dishes. Grind the seeds in a spice grinder or mortar and pestle to create a fine powder. Use the powdered dill seeds as a seasoning for roasted vegetables, grilled meats, stews, or bread. You can also sprinkle the whole dill seeds on top of baked goods such as bread or crackers for an interesting twist.
Dill Seed Infusions and Teas
Dill seed infusions and teas are popular for their potential health benefits and soothing properties. To make a dill seed infusion, simply steep a teaspoon of dill seeds in a cup of hot water for 10 to 15 minutes. Strain the infusion and enjoy it as a warm or chilled beverage. Dill seed infusions are known to aid digestion, relieve bloating, and promote relaxation. Experiment with adding other herbs or spices to create your own aromatic dill seed tea blends.
Conclusion
Sprouting dill seeds can be a rewarding and fulfilling experience, allowing you to enjoy the fresh flavors and aromas of this versatile herb. By choosing high-quality seeds, preparing the right sprouting environment, soaking the seeds, and caring for the seedlings, you can ensure successful growth and a bountiful harvest of dill leaves and seeds. From culinary delights to herbal infusions, dill offers countless opportunities for creative and delicious culinary experiences. So gather your supplies, follow the steps outlined in this guide, and let the sprouting journey begin!

