👋 Click the mic button to talk to Alfred, the Todd's Seeds Gardening/Sprouting Expert – Feel free to ask him anything!
Ask Virtual Todd Anything - Click the Mic
In this article, you will discover an innovative and fascinating way to grow your own flourishing plants right in the comfort of your home. By sprouting seeds in a simple bag, you can witness the magic of nature unfold before your eyes. This method is not only convenient and space-saving, but it also allows you to engage with the growth process from start to finish. Get ready to embark on a journey of discovery as you learn how to turn a humble bag into a vibrant garden bursting with life.

Choosing a Bag
When it comes to sprouting seeds in a bag, choosing the right bag is crucial. The bag you select will determine the success of your sprouting journey. There are a few key factors to consider when choosing a bag for sprouting: the material, size, and sealability.
Material
First and foremost, it’s important to select a bag made of food-safe material. Look for bags that are labeled as BPA-free and have been specifically designed for food storage. Common options include nylon, muslin, and organic cotton. These materials are breathable and allow for proper air circulation while preventing the growth of mold or bacteria.
Size
The size of the bag is another important consideration. You’ll want to choose a bag that is large enough to accommodate the seeds you plan to sprout. It should be spacious enough to allow for expansion during the sprouting process without causing overcrowding. On the other hand, selecting a bag that is too large may result in uneven moisture distribution, leading to subpar sprouting.
Sealability
The sealability of the bag is also crucial for successful sprouting. Look for bags that have a secure closure mechanism, such as a drawstring or zip-lock. This will ensure that the seeds stay securely contained and prevent any leakage or contamination. A well-sealed bag will also help maintain the proper moisture levels needed for sprouting, allowing you to achieve optimal results.
Selecting Seeds
Once you’ve chosen the perfect bag for your sprouting venture, it’s time to select the seeds you want to sprout. There are several factors to consider when choosing seeds, including the types of seeds, their quality and purity, and any specific requirements you may have.
Types of Seeds
The type of seeds you choose to sprout will depend on your personal preferences and dietary needs. Popular options for sprouting include alfalfa, broccoli, mung beans, and lentils. Each type of seed brings its unique flavor and nutritional profile to the table, so feel free to experiment and find what suits your taste buds and health goals.
Quality and Purity
When selecting seeds for sprouting, it’s essential to opt for high-quality seeds that are free from any contaminants or disease. Look for seeds that are labeled as organic and non-GMO (genetically modified organism). These seeds have been produced without the use of harmful pesticides or genetic modification, ensuring that you’re sprouting the healthiest possible sprouts.
Specific Requirements
Certain seeds have specific requirements for optimal sprouting. For example, some seeds may require pre-soaking, while others can be sprouted directly. Be sure to read and follow the seed-specific instructions provided on the packaging or consult reputable sources for the best practices. Taking these specific requirements into account will help you achieve the best results with your chosen seeds.
Preparing the Seeds
Before you begin the sprouting process, it’s important to properly prepare your seeds. This preparation involves soaking, rinsing, and draining the seeds to initiate their journey towards sprouting.
Soaking
Soaking is a crucial step in preparing seeds for sprouting. It helps to kickstart the germination process by hydrating the seeds and breaking their dormancy. To soak the seeds, place them in a bowl or container and cover them with water. The general rule of thumb is to soak the seeds for a specified period, usually between 6 to 12 hours, depending on the seed type. You may want to adjust the soaking time based on the specific sprouting requirements of your chosen seeds.
Rinsing
After the soaking period, it’s time to rinse the seeds thoroughly. Rinse them under cool, running water to remove any remaining debris or impurities. Be sure to gently agitate the seeds while rinsing to ensure that all surfaces are cleaned. Rinsing the seeds helps to keep them clean and prevents the growth of bacteria or mold during the sprouting process.
Draining
After rinsing, it’s essential to drain the seeds properly. Excess moisture can lead to rot or mold growth, so it’s important to allow the seeds to drain thoroughly. Place the seeds in a colander or sieve and allow the water to drain completely. Make sure the drainage is adequate and there’s no excess water left in the container or bag. Proper draining will contribute to the sprouting process by creating the ideal environment for growth without the risk of waterlogged seeds.
Choosing the Sprouting Method
Now that your seeds are ready, it’s time to choose the sprouting method that best suits your needs. There are several methods you can choose from, including the jar method, bag method, and various other innovative approaches.
Jar Method
The jar method is one of the most popular and traditional ways of sprouting seeds. It requires a glass jar with a mesh or sprouting lid. To sprout using this method, you’ll need to place the soaked and drained seeds in the jar, secure the sprouting lid, and rinse the seeds daily. The jar method provides excellent airflow and allows you to visually monitor the sprouting progress.
Bag Method
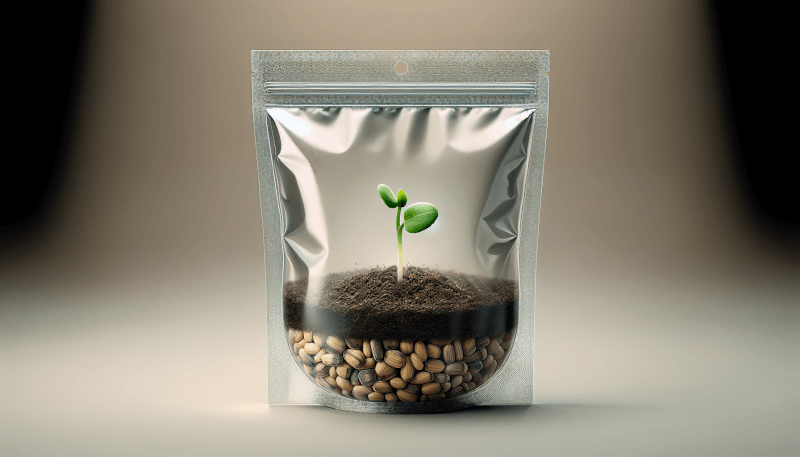
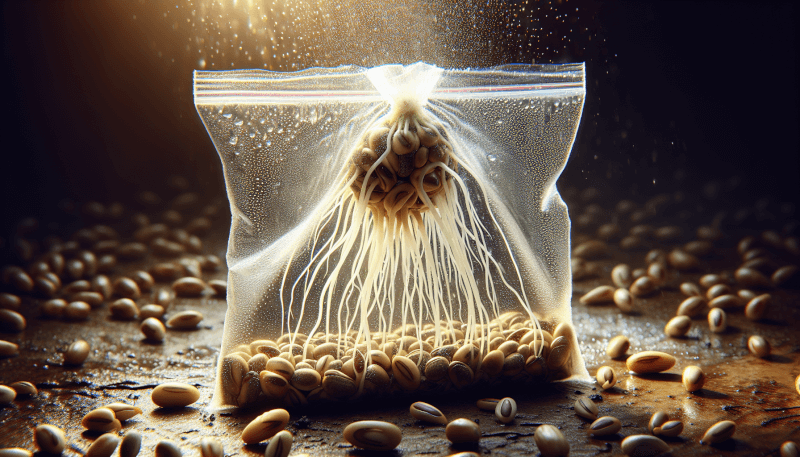
The bag method, as its name suggests, involves sprouting seeds in a bag. This method offers simplicity and convenience, making it a great option for beginners or those with limited space. To sprout using this method, after draining the seeds, transfer them to a food-safe sprouting bag, and follow the specific instructions provided. The bag method allows for easy rinsing and drainage, and it’s highly customizable to suit different seed types.
Other Methods
Apart from the jar and bag methods, there are various other sprouting methods you can explore. These include using sprouting trays or containers, growing sprouts on soil, or utilizing automated sprouting systems. Each method has its unique advantages and considerations, so feel free to experiment and find the one that works best for you.

Using the Bag Method
Now that we’ve delved into the bag method as a sprouting technique, let’s look at the specific materials needed, preparation steps, and the sprouting process itself.
Materials Needed
To begin sprouting using the bag method, you’ll need a few essential materials:
- Food-safe sprouting bag: Ensure you have a bag made from breathable and food-safe material, such as nylon, muslin, or organic cotton.
- High-quality organic seeds: Choose the seeds you want to sprout, making sure they are of excellent quality and suitable for sprouting.
- Water: You’ll need clean, filtered water for soaking and rinsing the seeds.
- Proper drainage: Opt for a bag with proper drainage holes or ensure you have a colander or sieve to drain the seeds effectively.
- Optional: It may be helpful to have a spray bottle or mister for daily rinsing and maintaining proper moisture levels.
Preparation Steps
Once you have gathered all the necessary materials, it’s time to prepare the seeds for sprouting:
- Soak the seeds: Place the seeds in a bowl or container and cover them with clean water. Follow the recommended soaking time for your specific seeds.
- Rinse the seeds: After the soaking period, rinse the seeds under cool, running water to remove any debris or impurities.
- Drain the seeds: Allow the seeds to drain fully to eliminate excess moisture and prevent mold or bacterial growth.
Sprouting Process
Now that the seeds are prepared, it’s time to begin the sprouting process using the bag method:
- Transfer the drained seeds to the sprouting bag: Place the drained seeds into the food-safe sprouting bag of your choice.
- Rinse the seeds: Rinse the seeds in the bag under cool, running water. Gently agitate the bag to ensure all surfaces are rinsed thoroughly.
- Drain the bag: Allow the bag to drain fully. You can hang it upside down or place it in a colander or sieve, ensuring that excess water is completely removed.
- Sprout maintenance: Repeat the rinsing and draining process two to three times a day, maintaining proper moisture levels. The exact frequency may vary based on the seed type and specific requirements.
- Monitor the sprouts: Keep an eye on the sprouts as they grow. Assess their progress based on the desired length or the appearance of leaves. The sprouting process typically takes several days.
Monitoring and Troubleshooting
As you embark on your sprouting journey, it’s important to monitor the sprouts regularly and troubleshoot any issues that may arise. Pay attention to moisture levels, temperature, light exposure, and common issues you might encounter.
Proper Moisture Levels
Maintaining proper moisture levels is crucial for successfully sprouting seeds. You’ll want to keep the sprouts moist but not overly wet. Excess water can lead to mold or bacterial growth, while insufficient moisture can hinder sprouting. Regular rinsing and draining, as well as proper airflow, play significant roles in maintaining the optimal moisture levels for your sprouts.
Temperature and Light
Temperature and light are other important factors to consider when sprouting seeds. Most seeds prefer a consistent temperature between 68°F to 72°F (20°C to 22°C) for optimal growth. Avoid exposing sprouts to direct sunlight, as this can result in scorching or overheating. Find a spot in your home that provides indirect light or utilize fluorescent lights in a controlled environment. Balancing these elements will ensure that your sprouts thrive.
Common Issues
While sprouting seeds can be a rewarding experience, it’s important to be aware of common issues that may arise:
- Mold or bacterial growth: If you notice any mold or unpleasant smells, it could indicate an issue with moisture levels. Ensure proper draining and consider reducing the watering frequency.
- Lack of sprouting: Sometimes, seeds may not sprout due to low viability or poor quality. Ensure that you’re using fresh, high-quality seeds and follow proper soaking and rinsing techniques.
- Wilting or yellowing sprouts: Wilting or yellowing sprouts may result from inadequate moisture or improper light exposure. Adjust the moisture levels and ensure that sprouts receive sufficient indirect light.
- Foul odors: Foul odors can indicate a bacterial or mold infection. It’s essential to discard any sprouts with foul smells and thoroughly clean your sprouting equipment.

Harvesting and Storing Sprouts
Once your sprouts have reached the desired length and have developed their characteristic leaves, it’s time to harvest and store them. It’s important to do this correctly to maximize freshness and maintain their nutritional benefits.
Determining Readiness
Determining the readiness of your sprouts depends on personal preference and the sprout type. Some sprouts, like broccoli or radish, are typically harvested at the first sign of leaves, while others, like alfalfa or clover, may be allowed to develop longer. Experiment with different harvest times to find the level of maturity that suits your taste and texture preferences.
Harvesting Techniques
To harvest sprouts, gently separate them from the seeds or growing medium. You can use clean hands or delicate kitchen tools, such as tweezers or scissors, to avoid damaging the delicate sprouts. Remove any seed hulls or unsprouted seeds that may have remained in the mix. Give the sprouts a final rinse to remove any debris, if necessary.
Storage Tips
To ensure the freshness and longevity of your harvested sprouts, proper storage is key:
- Refrigeration: Place the sprouts in a clean, airtight container lined with a paper towel. Store them in the refrigerator at a temperature of around 40°F (4°C). Consume them within a few days to maintain their freshness.
- Moisture control: It’s important to maintain proper moisture levels in the stored sprouts. Absorb any excess moisture with a clean paper towel to prevent premature spoilage.
- Hygiene practices: Always handle sprouts with clean hands and ensure that the storage container is thoroughly sanitized. Unsanitary conditions can lead to the growth of harmful bacteria.
- Batch harvesting: To enjoy a continuous supply of fresh sprouts, consider practicing batch harvesting. Start a new batch of sprouts a few days before finishing the current one, allowing you to rotate and have a constant supply.
Health and Safety Considerations
When sprouting seeds, it’s essential to prioritize cleanliness, food safety, and be aware of any potential risks associated with sprouting.
Cleanliness and Sanitization
Maintaining cleanliness throughout the sprouting process is crucial to prevent the growth of harmful bacteria and pathogens. Ensure that all equipment, including bags, jars, or sprouting trays, is thoroughly cleaned and sanitized before each use. Proper hand hygiene and the use of clean utensils will also contribute to keeping the sprouts safe and hygienic.
Potential Risks
While sprouting seeds at home is generally safe, there are some potential risks to be aware of. Sprouts that have been contaminated with salmonella or E. coli have been linked to foodborne illnesses. These types of pathogens can be present on the seeds themselves or introduced during the sprouting process. By selecting high-quality seeds, maintaining proper hygiene practices, and paying attention to food safety guidelines, you can greatly reduce the risk of contamination.
Food Safety Guidelines
To ensure optimal food safety when sprouting seeds, consider following these guidelines:
- Source high-quality seeds: Choose certified organic, non-GMO seeds from reputable suppliers.
- Proper sanitization: Clean and sanitize all equipment, containers, and utensils thoroughly before each use.
- Wash hands: Practice good hand hygiene by washing hands thoroughly before handling seeds or sprouts.
- Rinse thoroughly: Rinse the seeds and sprouts under cool, running water to remove any debris or surface contaminants.
- Avoid cross-contamination: Keep sprouts away from raw meats, eggs, or other potentially contaminated foods to prevent cross-contamination.
- Consume fresh sprouts: Enjoy sprouts within a few days of harvesting and avoid consuming sprouts that appear slimy, discolored, or have a foul odor.

Creative Uses for Sprouts
Sprouts are incredibly versatile and can be a delightful addition to various meals and recipes. Get creative and explore different ways of incorporating sprouts into your culinary creations.
Incorporating into Meals
Add a fresh and crunchy touch to your favorite meals by incorporating sprouts. Top off salads, stir-fries, or grain bowls with sprouts to elevate their texture and nutritional value. Include sprouts in wraps, tacos, or sandwiches for an extra layer of flavor. Explore the world of sprouts by experimenting with different combinations and discovering your favorite pairings.
Adding to Salads and Sandwiches
Sprouts can turn an ordinary salad or sandwich into a vibrant, nutritious delight. Mix sprouts into green salads or use them as the base for a refreshing salad. Their crisp texture and mild flavor complement a range of salad dressings and toppings. Sprouts can also be used to layer sandwiches or wraps, providing a healthy boost and adding a delightful crunch.
Blending in Smoothies
For a more unconventional use of sprouts, consider blending them into your morning smoothies. Sprouts such as sunflower or pea shoots can add a nutrient-packed punch to your smoothie creations. Their delicate flavor blends seamlessly with fruits and leafy greens, providing an extra dose of vitamins, minerals, and antioxidants.
Benefits of Sprouting Seeds
Sprouting seeds not only add a delightful crunch to meals but also offer numerous health benefits. Let’s explore some of the key advantages of incorporating sprouts into your diet.
Improved Nutrient Availability
During the sprouting process, seeds undergo a transformation where their nutrient profile becomes more accessible to our bodies. Sprouting promotes enzymatic activity, leading to increased nutrient availability. This means that sprouts are rich in vitamins, minerals, and enzymes, making them a nutrient powerhouse.
Enhanced Digestibility
Sprouts are easier to digest compared to their unsprouted counterparts. The soaking and sprouting process activates enzymes that break down complex carbohydrates, proteins, and fats into simpler forms. This improved digestibility can lead to reduced bloating, gas, and discomfort often associated with consuming raw or unprocessed seeds or grains.
Health Benefits
In addition to their improved nutrient availability and enhanced digestibility, sprouts offer various health benefits. They are a great source of dietary fiber, aiding in digestion and promoting bowel regularity. Sprouts are also rich in antioxidants, which help protect cells from damage caused by free radicals. Including sprouts in your diet may contribute to improved immune function and overall well-being.
In conclusion, sprouting seeds in a bag is an accessible and rewarding way to enhance your culinary repertoire and boost your nutritional intake. By carefully selecting the right bag, high-quality seeds, and following proper preparation and sprouting techniques, you can enjoy the pleasure of homegrown sprouts. Whether you choose the bag method or explore other sprouting techniques, monitoring the sprouts’ progress, ensuring hygiene, and adhering to food safety guidelines are paramount. So go ahead, embark on your sprouting journey, and savor the health benefits and creative uses of sprouts!
