👋 Click the mic button to talk to Alfred, the Todd's Seeds Gardening/Sprouting Expert – Feel free to ask him anything!
Ask Virtual Todd Anything - Click the Mic
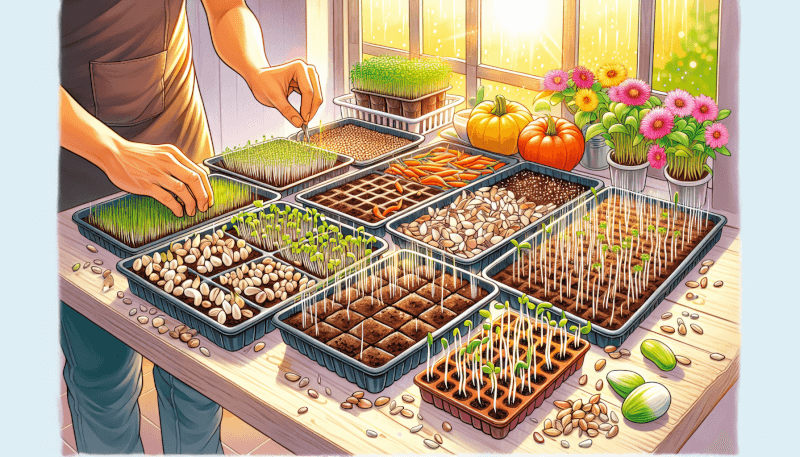
Are you looking to grow your own fresh and nutritious sprouts right at home? Look no further than sprouting seeds in trays! This article will guide you through the simple and rewarding process of sprouting seeds in trays, allowing you to enjoy a constant supply of vibrant and delicious sprouts throughout the year. With just a few easy steps, you’ll be able to nurture your own mini garden of sprouts, packed with vitamins, minerals, and fantastic flavors. So grab your trays, seeds, and let’s get sprouting!

Choosing the Right Tray
Material of the Tray
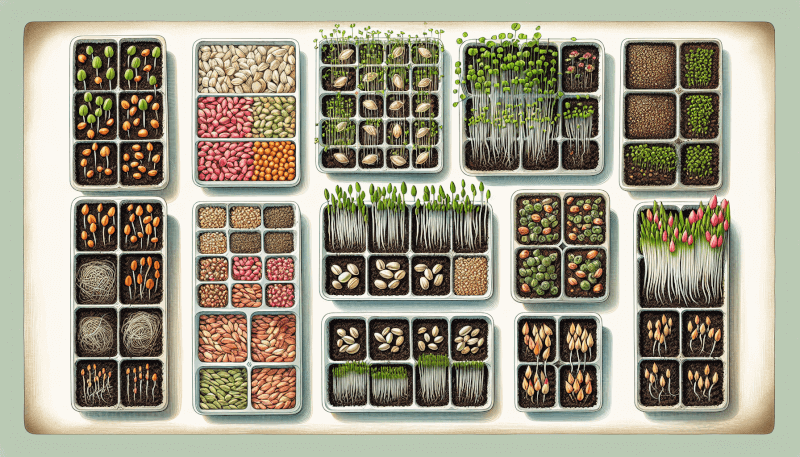
When it comes to choosing the right tray for sprouting seeds, the material plays a crucial role. You have several options to consider, such as plastic, clay, or even recycled materials. Plastic trays are lightweight, durable, and easy to clean, making them a popular choice among gardeners. Clay trays, on the other hand, provide good airflow and moisture regulation, which can be beneficial for certain seeds. If you’re environmentally conscious, opting for trays made from recycled materials can be a sustainable choice.
Size of the Tray
The size of the tray is another important factor to consider. Depending on the number of seeds you plan to sprout, you can choose trays in various sizes, ranging from small windowsill trays to large, commercial-sized ones. Keep in mind that the size of the tray will impact the amount of space the seedlings require as they grow, so it’s important to choose a size that accommodates your needs.
Drainage System
A proper drainage system is essential to prevent waterlogging and ensure the healthy growth of your sprouted seeds. Look for trays with adequate drainage holes or ones that come with trays specifically designed to collect excess water. Good drainage will prevent the seeds from sitting in stagnant water, which can lead to root rot and other detrimental effects on the sprouts’ health.
Preparing the Tray
Cleaning the Tray
Before starting the sprouting process, it’s crucial to clean the tray thoroughly. Any residue or debris left on the tray could potentially harbor harmful bacteria or fungi, which can negatively impact the germination and growth of the seeds. Cleaning the tray with a mild soap or a diluted bleach solution and rinsing it well will help ensure a clean environment for your sprouts.
Adding a Tray Liner
Using a tray liner can provide various benefits during the sprouting process. A liner made of materials like burlap, paper towel, or coconut coir can help retain moisture, promote healthy root growth, and prevent soil erosion. It also makes it easier to clean the tray after each use, as you can simply remove and replace the liner.
Creating Drainage Holes
If your chosen tray doesn’t come with pre-drilled drainage holes, you’ll need to create them. Using a drill or a heated implement, carefully make small holes in the bottom of the tray. These holes will allow excess water to drain out, preventing waterlogged soil and potential damage to the sprouting seeds.

Selecting the Seeds
Type of Seeds
Choosing the right type of seeds is crucial for successful sprouting. Consider what you intend to grow – whether it’s vegetables, herbs, or flowers – and select the appropriate seeds accordingly. Different seeds have different requirements in terms of sunlight, temperature, and moisture, so it’s essential to choose seeds that align with the environment you can provide.
Quality of Seeds
The quality of the seeds you choose greatly impacts their germination rate and overall growth. Opt for reputable seed suppliers or trusted sources to ensure that you’re getting high-quality, viable seeds. Check for indicators like plumpness, firmness, and absence of damage or discoloration. Quality seeds have a higher chance of germinating and developing into healthy seedlings.
Growing Conditions
Consider the specific growing conditions required by the seeds you’ve chosen. Some seeds thrive in full sun, while others prefer partial shade. Similarly, certain seeds have temperature preferences, and providing the right humidity levels can significantly impact their growth. Understanding the unique needs of your chosen seeds will help you create an ideal environment for successful sprouting.
Soaking Seeds
Importance of Soaking
Soaking seeds before planting can significantly improve their germination rates and overall growth. Soaking softens the seed coat and triggers the germination process, allowing the seeds to absorb water and essential nutrients more effectively. This process also helps to speed up the germination process, reducing the time it takes for the first signs of sprouting to appear.
Duration of Soaking
The duration of soaking varies depending on the type of seed. While some seeds only require a few hours of soaking, others may benefit from overnight or even multiple-day soaking. It’s important to refer to the specific seed instructions or guides for the recommended soaking duration. Over-soaking, however, can have negative consequences, so be cautious not to exceed the recommended time.
Proper Soaking Technique
To soak your seeds properly, place them in a container or a bowl and cover them with room temperature water. Avoid using hot water, as it can damage the seeds. Allow the seeds to soak for the recommended time, ensuring that the water level remains sufficient. After soaking, carefully drain the excess water and prepare the seeds for sowing in the trays.

Sowing Seeds in Trays
Spacing and Depth
When sowing your soaked seeds in trays, spacing and depth are key considerations. The spacing between the seeds will depend on the specific plant’s growth habit and the size it will attain. Follow the instructions provided with your seeds or refer to gardening resources for recommended spacing guidelines. As for the depth, a general rule of thumb is to sow the seed at a depth that is about twice its size.
Germination Rates
The germination rates of different seeds vary, and it’s important to manage your expectations accordingly. Some seeds sprout quickly, while others may take longer. Some may have higher germination rates, while others may be lower. By understanding the expected germination rates of the seeds you’re sprouting, you can monitor their progress and make any necessary adjustments to ensure healthy growth.
Labeling the Trays
To keep track of the different seeds you’ve sown, labeling the trays is essential. Use waterproof labels or markers to clearly indicate the type of seed and the date of sowing. This simple step will help you identify each tray easily, record observations accurately, and ensure proper care and maintenance for the growing seedlings.
Providing Optimal Conditions
Light Requirements
Light is a fundamental factor in the successful growth of sprouted seeds. Ensure that your trays are placed in a location that receives adequate sunlight per the requirements of the specific seeds. Some seeds prefer direct sunlight, while others may thrive better in indirect or filtered light. If natural light is limited, consider using artificial lights, such as fluorescent or LED grow lights, to provide the necessary light spectrum for optimal growth.
Temperature and Humidity
Maintaining the right temperature and humidity levels is crucial for seed germination and the subsequent growth of sprouts. Each type of seed has its own preferred temperature range, so it’s essential to provide the appropriate conditions. Consider using a seedling heat mat or a thermostat-controlled environment to ensure consistent warmth. Additionally, using a humidity dome or misting the trays regularly can help maintain the necessary moisture levels.
Air Circulation
Good air circulation is important to prevent stagnation and encourage healthy growth. Make sure the trays are not overcrowded, as this can limit airflow. Placing a small fan nearby on a low setting can help ensure proper ventilation, preventing the build-up of excessive moisture, which can lead to mold or fungal issues. Allow for sufficient space between trays to allow air to circulate freely.

Watering the Seeds
Watering Techniques
Watering your sprouting seeds correctly is vital to their overall health and growth. It’s important to water gently, using a watering can with a fine spray or a misting bottle. This helps prevent disturbing the seeds or dislodging them from their designated spots in the tray. Aim to keep the soil consistently moist, but not overly saturated.
Frequency of Watering
The frequency of watering will depend on various factors such as the seed type, environmental conditions, and the moisture retention capacity of the soil or growing medium. Regularly monitor the moisture level and adjust your watering schedule accordingly. Avoid letting the soil dry out completely, as this can negatively affect seed germination and the health of the developing seedlings.
Preventing Overwatering
Overwatering can be detrimental to the growth of your sprouted seeds. It can lead to root rot, mold growth, or poor nutrient uptake. To prevent overwatering, ensure proper drainage in the tray and avoid excessive watering beyond what is necessary to keep the soil moist. Regularly check the moisture level by gently touching the soil surface to gauge the need for watering.
Monitoring and Care
Observing Germination Progress
Monitoring the germination progress of your seeds allows you to assess their health and make any necessary adjustments. Keep a close eye on the trays, looking for signs of seedling emergence, such as small green shoots or cotyledon leaves. Record the germination time and compare it with the expected germination rate for each type of seed. Identifying any issues early on will help you address them promptly.
Thinning Out Seedlings
As the seedlings grow, they may become overcrowded in the tray. Thinning out the seedlings involves removing or spacing them to ensure adequate room for growth and proper airflow. Carefully remove the excess seedlings, leaving behind the healthiest and strongest ones. Thinning will help prevent competition for nutrients, reduce the risk of disease spread, and promote the development of robust plants.
Fertilizing the Seedlings
Once the seedlings have established themselves, providing them with adequate nutrients becomes important. Consider using a balanced, water-soluble fertilizer suitable for seedlings. Follow the instructions provided on the fertilizer package and apply it at the recommended dilution rate. Fertilizing should be done with care, ensuring not to use excessive amounts that could potentially harm the seedlings. Regularly monitor the growth and health of the seedlings to assess their nutrient needs.

Transplanting Seedlings
Timing for Transplanting
Transplanting seedlings to their final growing location should be done at the appropriate time to ensure their successful adaptation. Consider the specific seedling’s growth rate and the recommended transplanting timeframe for the plant. The ideal timing will vary by plant type and growing region, so refer to seed packaging or reliable gardening sources for guidance. Transplanting too early or too late can lead to stress and hinder the plant’s development.
Hardening Off
Before transplanting the seedlings directly into the garden or larger pots, a process called “hardening off” is necessary. Hardening off gradually acclimates the tender seedlings to outdoor conditions, preparing them for the change in temperature, sunlight exposure, and wind. Start by exposing the seedlings to outdoor conditions for short periods, gradually increasing the duration as the days pass. This process typically takes a week or two before the seedlings are ready for transplanting.
Transplanting Techniques
When transplanting seedlings, gently remove them from the tray, ensuring minimal root disturbance. Prepare the transplanting location by digging a hole slightly larger than the root ball of the seedling. Place the seedling in the hole and carefully backfill the soil, firming it gently around the plant. Water the seedling immediately after transplanting to help settle the soil and provide initial hydration.
Common Problems and Solutions
Damping-off Disease
Damping-off disease is a common issue that can affect sprouted seeds. It is caused by fungal pathogens in the soil and can result in the rotting of seedlings at the base of the stem. To prevent damping-off, ensure proper drainage and avoid overwatering. Additionally, using sterilized soil or a sterile seeding mix can help minimize the risk of fungal infections. If damping-off occurs, consider adjusting watering practices or using fungicidal treatments as necessary.
Pest Infestation
Pests can pose a threat to your sprouting seeds and seedlings. Keep a close eye on your trays for signs of pests such as aphids, mites, or caterpillars. If you spot any unwanted visitors, consider implementing organic pest control measures, such as using insecticidal soap or introducing beneficial insects. Regularly inspecting and maintaining a clean growing environment can help prevent severe pest infestations.
Nutrient Deficiencies
Nutrient deficiencies can manifest as leaf discoloration or stunted growth in seedlings. To address this issue, ensure that your growing medium or soil is nutrient-rich. Consider using a balanced organic fertilizer based on the nutrient requirements of the specific plants you’re growing. Regularly monitor the seedlings’ appearance and address any nutrient deficiencies promptly through appropriate fertilization practices.
By following these comprehensive steps, you’ll be on your way to successfully sprouting seeds in trays. From choosing the right tray and preparing it properly to selecting high-quality seeds, soaking, sowing, and providing optimal conditions, each stage plays a crucial role in the growth of healthy seedlings. Remember to monitor your sprouts closely, adjust as needed, and address any common problems that may arise. With patience and care, you’ll soon be rewarded with flourishing seedlings ready for transplantation and a bountiful garden.