👋 Click the mic button to talk to Alfred, the Todd's Seeds Gardening/Sprouting Expert – Feel free to ask him anything!
Ask Virtual Todd Anything - Click the Mic
Imagine a world where every backyard is transformed into a vibrant haven for birds, filled with the joyous melody of their songs. In this article, you will discover the simple yet powerful practice of sprouting seeds for birds, and how it can be a game-changer for both you and your feathered friends. By offering sprouted seeds, you can provide birds with a nutrient-packed and easily digestible feast, while also fostering a deeper connection with nature right outside your window. So, grab your gardening gloves and get ready to embark on a remarkable journey of nurturing, as we explore the wonders of sprouting seeds for birds.

Choosing the Right Seeds
Understanding the Dietary Needs of Birds
When it comes to sprouting seeds for birds, it’s important to understand their dietary needs. Birds require a balanced diet that consists of different nutrients to maintain their health and well-being. By providing a variety of sprouted seeds, you can ensure that your feathered friends receive the necessary vitamins, minerals, and proteins they need to thrive.
Variety of Seeds to Consider
There are many different types of seeds that you can sprout for birds. Some popular options include sunflower seeds, alfalfa seeds, broccoli seeds, radish seeds, and mung beans. Each type of seed offers its own unique nutritional profile, so it’s beneficial to offer a variety of sprouted seeds to ensure a well-rounded diet for your birds.
Seeds to Avoid
While there are plenty of seeds that are safe and healthy for birds to consume, there are a few seeds that should be avoided. These include seeds from fruit trees, such as apples, cherries, and peaches, as well as seeds from avocado. These seeds contain substances that can be harmful to birds. It’s always best to research and consult with avian experts or veterinarians to ensure you’re providing safe and suitable seeds for your feathery friends.
Preparing Sprouting Containers
Selecting the Right Container
Choosing the right container for sprouting seeds is crucial for successful sprouting. You can use a variety of containers, such as glass jars, trays, or sprouting bags. The container should provide enough space for the seeds to sprout and allow proper air circulation. It’s important to avoid containers made of materials that may leach chemicals or toxins into the sprouting process.
Cleaning and Disinfecting
Before using any sprouting container, it’s important to thoroughly clean and disinfect it to prevent the growth of harmful bacteria or mold. Wash the container with hot soapy water and rinse it well. Then, disinfect it by soaking it in a mixture of one part vinegar to three parts water or a food-grade hydrogen peroxide solution. Rinse the container thoroughly before using it for sprouting.
Creating Proper Drainage
Proper drainage is essential for successful sprouting. Ensure that your sprouting container has drainage holes or a mesh screen at the bottom to allow excess water to escape. This prevents the seeds from becoming waterlogged, which can lead to mold or fungal growth.
Choosing the Right Sprouting Medium
There are different types of sprouting mediums you can use, such as soil, vermiculite, or paper towels. Select a sprouting medium that works best for the type of seeds you’re sprouting. Some seeds prefer a soil-like medium, while others do well with a moist paper towel or tray method. Experiment with different mediums to find what works best for your sprouting needs.

Soaking and Rinsing the Seeds
Soaking Seeds for Optimal Sprouting
Before sprouting the seeds, it’s crucial to soak them to initiate the germination process. Soaking softens the outer shells and activates the enzymes necessary for sprouting. Place the seeds in a clean container and cover them with room temperature water. Let them soak for the recommended time to ensure optimal sprouting.
Ideal Soaking Time for Different Seeds
Different types of seeds require different soaking times to achieve optimal sprouting. For example, sunflower seeds generally require 8-12 hours of soaking, while mung beans may need to soak for up to 24 hours. It’s important to research the specific soaking times for the seeds you’re sprouting to achieve the best results.
Rinsing Seeds to Remove Excess Starch
After soaking, it’s essential to rinse the seeds to remove excess starch and any residue that may have accumulated. Rinse the seeds under running water, gently agitating them with your hands to ensure thorough rinsing. This process helps prevent the growth of mold or bacteria and promotes healthy germination.
Frequency of Rinsing
During the sprouting process, it’s important to rinse the seeds regularly to maintain proper moisture levels and prevent mold growth. The frequency of rinsing depends on the type of seeds and the sprouting method you’re using. As a general guideline, rinsing the seeds once or twice a day is usually sufficient. However, make sure to adjust the rinsing frequency based on your observations and the specific seeds you’re sprouting.
Sprouting Techniques
Basic Sprouting Method
The basic sprouting method involves using a glass jar with a mesh or sprouting lid. After soaking the seeds, drain the water and place the seeds in the sprouting jar. Cover the jar with the mesh or sprouting lid and place it in an area with indirect sunlight. Rinse the seeds regularly, following the recommended rinsing frequency for the specific seeds. Continue rinsing until the seeds have sprouted to the desired length.
Mason Jar Sprouting Method
The mason jar sprouting method is similar to the basic sprouting method but uses a mason jar instead of a regular glass jar. It’s important to choose a mason jar with a wide mouth and a sprouting lid or a piece of mesh secured with a rubber band. This method allows for easy rinsing and drainage, making it a popular choice for sprouting seeds.
Tray Sprouting Method
The tray sprouting method involves using shallow trays or containers with drain holes to sprout the seeds. Spread a layer of sprouting medium evenly in the tray and moisten it with water. Then, scatter the soaked seeds over the medium and cover the tray with a clear dome or plastic wrap to create a greenhouse effect. Place the tray in a well-ventilated area and ensure the medium remains moist by misting it with water as needed.
Using a Sprouting Bag
A sprouting bag is a convenient option for sprouting seeds, especially if you’re sprouting a large quantity or prefer a more portable method. Place the soaked seeds in the sprouting bag, rinse them to remove excess starch, and hang the bag in a well-ventilated area. Make sure to keep the bag moist by misting it with water regularly. The sprouting bag provides excellent air circulation and prevents the seeds from becoming waterlogged.

Ensuring Proper Moisture and Air Circulation
Importance of Proper Moisture Levels
Proper moisture levels are crucial for successful sprouting. Seeds need enough moisture to germinate and sprout but should not be overly saturated. Too much moisture can lead to mold or bacterial growth, while insufficient moisture can hinder germination. It’s important to strike a balance and maintain consistent moisture levels throughout the sprouting process.
Methods to Maintain Moisture
To maintain proper moisture levels, it’s essential to monitor the sprouting seeds regularly. If the seeds appear dry or the sprouting medium is starting to dry out, mist them with water to keep them moist. However, be cautious not to oversaturate the seeds or the sprouting medium. Adjust the frequency of misting based on the specific seeds and the environmental conditions.
Avoiding Excessive Moisture
Excessive moisture can create an environment favorable for mold or bacterial growth, which can be harmful to the sprouting seeds. To avoid excessive moisture, make sure to drain any excess water after soaking the seeds and provide proper drainage in your sprouting container. Additionally, ensure adequate air circulation to prevent excessive moisture accumulation.
Providing Adequate Air Circulation
Air circulation is essential for successful sprouting. Proper airflow helps prevent the buildup of moisture and stagnant air, reducing the risk of mold or bacterial growth. When sprouting seeds, place your containers or trays in a well-ventilated area with indirect sunlight. If necessary, use a small fan or open a nearby window to ensure consistent airflow around the sprouting seeds.
Monitoring and Troubleshooting
Monitoring Sprouting Progress
Regular monitoring of the sprouting progress is essential to ensure that everything is going smoothly. Observe the sprouting seeds daily, checking for any signs of mold, fungal growth, or unusual discoloration. Monitor the moisture levels, rinse the seeds as necessary, and make adjustments to the sprouting environment if needed. By actively monitoring the sprouting process, you can address any issues promptly and ensure successful sprouting.
Signs of Mold or Fungal Growth
Mold or fungal growth can occur due to excessive moisture or inadequate airflow. Signs of mold or fungal growth include fuzzy or discolored patches on the sprouting seeds or sprouts. If you notice any of these signs, it’s important to take immediate action to prevent further contamination.
Dealing with Mold or Fungal Issues
If mold or fungal growth occurs during the sprouting process, it’s crucial to address the issue promptly to prevent the spread of harmful organisms. Remove any affected seeds or sprouts, rinse the remaining seeds thoroughly, and adjust the sprouting environment to improve air circulation. Consider using a natural antifungal solution, such as diluted hydrogen peroxide, as a preventive measure. If the issue persists, consult with avian experts or veterinarians for further guidance.
Preventing Pest Infestation
Pest infestations can pose a threat to the sprouting seeds and the birds. To prevent pests, such as insects or rodents, from infesting your sprouting seeds, store them in a secure location away from potential entry points. Regularly inspect the storage area for any signs of pest activity and promptly address any issues. Maintaining a clean and pest-free environment is essential for ensuring the safety and quality of the sprouted seeds.

Feeding Sprouted Seeds to Birds
When to Offer Sprouted Seeds
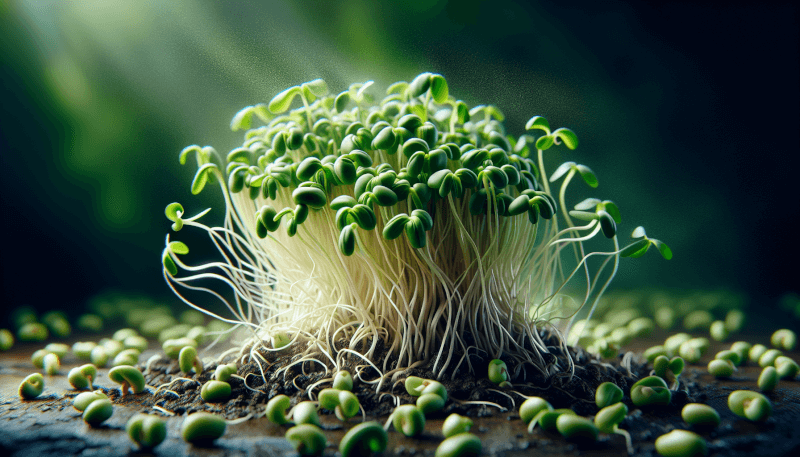
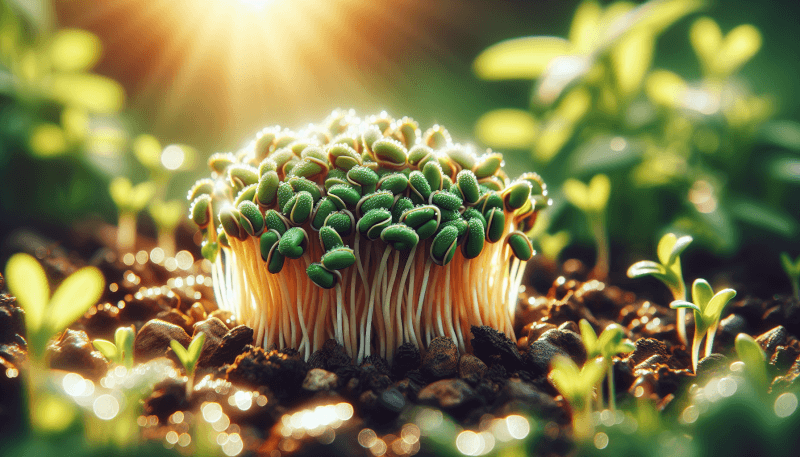
Once the seeds have sprouted and reached the desired length, they are ready to be offered to the birds. Most sprouted seeds are best fed when the sprout is around 1-2 inches in length. At this stage, the sprouts are tender and packed with nutrients, making them highly beneficial for your feathered friends.
Introducing Sprouted Seeds Gradually
When introducing sprouted seeds to your birds, it’s important to do so gradually. Start by offering a small amount of sprouted seeds alongside their regular diet. Observe how your birds respond to the sprouted seeds, and gradually increase the amount over time. This allows the birds to adjust to the new food and prevents any digestive issues that may arise from a sudden dietary change.
Feeding Methods – In or Out of the Cage?
Whether you choose to feed the sprouted seeds in or out of the cage depends on your preferences and the behavior of your birds. Some bird owners prefer to offer the sprouted seeds in a separate dish within the cage, while others prefer to provide them during supervised out-of-cage time. Consider your bird’s comfort and safety when deciding on the feeding method.
Supplementing with Other Foods
While sprouted seeds offer numerous benefits, it’s important to remember that they should not replace a varied and balanced diet. Supplementing the sprouted seeds with other foods, such as fresh fruits, vegetables, and high-quality pellets or seeds, ensures that your birds receive all the necessary nutrients for optimal health. Consult with avian experts or veterinarians to determine the best diet for your specific bird species.
Benefits of Sprouted Seeds for Birds
Improved Nutritional Value
Sprouted seeds offer an enhanced nutritional value compared to their unsprouted counterparts. Sprouting increases the bioavailability of nutrients, making them easier for birds to digest and absorb. Additionally, sprouted seeds contain higher levels of vitamins, minerals, enzymes, and proteins, providing a nutrient-rich boost to your bird’s diet.
Enhanced Digestion and Absorption
The sprouting process activates enzymes that aid in digestion and improve nutrient absorption. Birds with sensitive digestive systems can benefit from the increased digestibility of sprouted seeds, as they are more easily broken down and assimilated. By incorporating sprouted seeds into your bird’s diet, you can promote optimal digestion and nutrient utilization.
Promotion of Natural Foraging Behavior
Birds have a natural instinct for foraging, and sprouted seeds can help stimulate and fulfill this instinct. Sprouted seeds provide an interactive feeding experience, as birds can pick and eat the sprouts. This promotes mental stimulation, decreases boredom, and replicates the natural foraging behavior that birds would exhibit in the wild.
Boosting Immune System
A balanced diet plays a crucial role in maintaining a bird’s immune system. Sprouted seeds contain antioxidants and phytochemicals that support overall health and boost the immune system. By incorporating sprouted seeds into your bird’s diet, you can provide them with an extra dose of immune-boosting nutrients, helping to keep them healthy and resilient.

Potential Risks and Considerations
Allergy or Sensitivity Concerns
Just like humans, birds can have allergies or sensitivities to certain foods. While sprouted seeds are generally safe and well-tolerated, it’s important to monitor your bird’s reaction when introducing new foods. If you notice any signs of allergic reactions, such as sneezing, itching, or changes in behavior, discontinue feeding the sprouted seeds and consult with avian experts or veterinarians for further guidance.
Proper Storage to Prevent Spoilage
Proper storage is crucial to prevent spoilage of the sprouted seeds. After sprouting, it’s important to store the seeds in a cool, dry place in an airtight container. Avoid exposing the sprouts to direct sunlight, excessive heat, or humidity, as these can accelerate spoilage. Discard any sprouts that appear mushy, slimy, or have a foul odor, as they may indicate spoilage or bacterial growth.
Seed Selection for Different Bird Species
Different bird species have varied dietary requirements and preferences. Certain seeds may be more suitable for specific bird species, while others may not provide adequate nutrition. Research the specific dietary needs of your bird species and consult with avian experts or veterinarians to determine the best seed selection for optimal health and well-being.
Consulting Avian Experts
While the information provided in this article serves as a comprehensive guide, it’s always beneficial to consult with avian experts or veterinarians for personalized advice and guidance. These professionals have extensive knowledge and experience in avian nutrition and can provide valuable insights tailored to your specific bird species and individual needs.
Conclusion
Sprouting seeds for birds is an excellent way to provide nutritious and palatable food for your feathered friends. By understanding their dietary needs, selecting the right seeds, and following proper sprouting techniques, you can promote their health and well-being. Sprouted seeds offer improved nutritional value, enhanced digestion, and absorption, and stimulate natural foraging behavior. However, it’s essential to be aware of potential risks, properly store the sprouted seeds, and adapt the seed selection to your specific bird species. By following essential guidelines and consulting avian experts, you can ensure that your birds enjoy the many benefits of sprouted seeds and thrive.