👋 Click the mic button to talk to Alfred, the Todd's Seeds Gardening/Sprouting Expert – Feel free to ask him anything!
Ask Virtual Todd Anything - Click the Mic
Have you ever tried sprouting seeds at home, only to find them going mouldy before they have a chance to grow? It can be frustrating to see your efforts go to waste. In this article, we will explore the common causes of sprouting seeds going mouldy, and provide you with some helpful tips to prevent this from happening. So, if you’re ready to learn how to ensure successful sprouting without any mouldy surprises, keep reading!

Causes of mouldy sprouting seeds
Poor seed quality
One of the main causes of mouldy sprouting seeds is poor seed quality. When you choose seeds that are of low quality or have been poorly stored, they may already be contaminated with mould or fungus, which can cause the sprouts to become mouldy as they grow.
Inadequate ventilation
Another factor that can contribute to mouldy sprouting seeds is inadequate ventilation. If the sprouting containers or trays do not have sufficient airflow, the moisture from the sprouting process can become trapped, creating the perfect environment for mould to thrive.
High humidity levels
High humidity levels are also a common cause of mouldy sprouting seeds. When the environment is excessively humid, it becomes easier for mould spores to multiply and infest the sprouts, leading to mouldy growth.
Improper rinsing and drainage
Improper rinsing and drainage are important considerations when sprouting seeds. If the seeds are not rinsed thoroughly before the sprouting process begins, any contaminants or mould present on their surface can continue to grow and cause mouldy sprouts. Additionally, inadequate drainage can result in excess water remaining in the sprouting containers, promoting mould growth.
Contaminated water
Using contaminated water to sprout seeds can introduce mould spores and other contaminants into the process. It is important to use clean and purified water to minimize the risk of mould growth.
Infected or damaged seeds
Lastly, using infected or damaged seeds can result in mouldy sprouting. If the seeds are already compromised by disease or damage, they are more susceptible to mould growth during the sprouting process.
Preventing mouldy sprouting seeds
Choosing high-quality seeds
To prevent mouldy sprouting seeds, it is crucial to choose high-quality seeds. Buy from reputable suppliers who are known for their commitment to quality. Additionally, ensure that the seeds have been stored properly to maintain their freshness and minimize the risk of mould contamination. Consider purchasing certified organic seeds to further reduce the likelihood of mould issues.
Ensuring proper ventilation
Proper ventilation is vital to prevent mould growth during the sprouting process. Use mesh or perforated lids for sprouting containers to allow for adequate airflow. It is important to maintain consistent airflow around the sprouting seeds to discourage the accumulation of moisture that can lead to mould formation. Avoid overcrowding the sprouting containers, as this can hinder proper air circulation.
Managing humidity levels
Controlling humidity levels is crucial in preventing mouldy sprouting seeds. Use a hygrometer to measure the humidity in the sprouting area. If the humidity is too high, consider using a dehumidifier to reduce moisture. On the other hand, if the humidity is too low, a humidifier can help increase moisture levels. Avoid sprouting seeds in areas with high natural humidity, as this can increase the chances of mould growth.
Rinsing and draining properly
Proper rinsing and draining of seeds are essential steps in preventing mouldy sprouting. Before beginning the sprouting process, thoroughly rinse the seeds to remove any surface contaminants. Additionally, ensure that excess water is completely drained from the sprouting containers. Following recommended soaking and rinsing periods will help reduce the risk of mould growth.
Using clean water
Using clean water is crucial to prevent mouldy sprouting seeds. Opt for filtered or purified water to minimize the presence of potential contaminants. If you are unsure about the quality of your water source, consider boiling it before using it to sprout seeds. This will help kill any potential mould spores or other contaminants that may be present. Avoid using chlorinated water, as the chemicals in chlorine can negatively affect the sprouting process.
Inspecting seeds for damage or infection
Thoroughly inspecting the seeds before sprouting can help identify any signs of damage or infection. Remove any seeds that appear discolored, have visible mould growth, or exhibit signs of damage. By only selecting healthy and intact seeds, you can minimize the risk of mouldy sprouting.

Signs of mouldy sprouting seeds
Visible mould growth
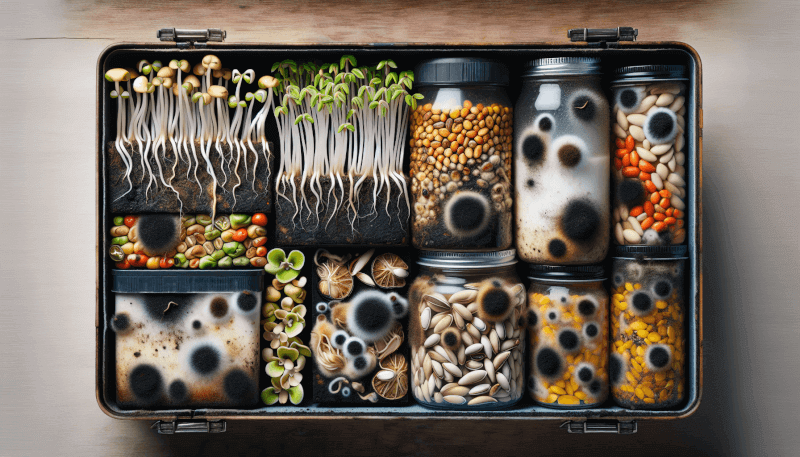
One of the most obvious signs of mouldy sprouting seeds is the presence of visible mould growth on the sprouts. Mould can appear as fuzzy patches or spots, typically green, black, or white in color.
Unpleasant odor
Mouldy sprouting seeds often emit an unpleasant and musty odor. If you notice a foul smell coming from your sprouts, it is likely an indication of mould contamination.
Slimy texture
Mouldy sprouting seeds may develop a slimy texture as a result of the mould growth. The sprouts can feel slippery or sticky to the touch, indicating the presence of mould.
Discoloration
Mould can cause the sprouts to exhibit discoloration, such as dark spots or a generally darkened appearance. If you notice any abnormal coloration in your sprouts, it is a sign of possible mould growth.
Effects of consuming mouldy sprouting seeds
Food poisoning
Consuming mouldy sprouting seeds can lead to food poisoning. Mould produces toxins that can cause gastrointestinal issues, such as nausea, vomiting, and diarrhea. In severe cases, it can even result in more serious complications requiring medical intervention.
Allergic reactions
Some individuals may be allergic to mould, and consuming mouldy sprouting seeds can trigger allergic reactions. These reactions can range from mild symptoms, such as sneezing and itching, to more severe responses, including difficulty breathing and anaphylaxis.
Digestive issues
Eating mouldy sprouting seeds can also lead to digestive issues. The toxins produced by mould can irritate the digestive system, causing bloating, abdominal pain, and discomfort. In individuals with pre-existing digestive conditions, mould exposure can exacerbate symptoms.

Dealing with mouldy sprouting seeds
Discarding affected seeds
If you discover mouldy sprouting seeds, it is essential to discard them immediately. Do not attempt to salvage the sprouts, as mould contamination can spread and potentially make you ill if consumed. The affected seeds should be disposed of properly to prevent any further contamination.
Sanitizing growing containers
After discarding the affected seeds, it is crucial to thoroughly clean and sanitize the sprouting containers to prevent future mould growth. Wash the containers with warm water and mild soap, ensuring that all surfaces are thoroughly cleaned. Rinse them well and consider using a food-grade sanitizer to eliminate any remaining mould spores.
Monitoring sprouting process
Regularly monitoring the sprouting process is important to detect any signs of mould growth early on. Keep an eye on the sprouts for any visible mould, unpleasant odor, slimy texture, or discoloration. If any of these signs are present, take immediate action to prevent further contamination or consumption of mouldy sprouts.
Choosing alternative sprouting methods
If you experience repeated issues with mouldy sprouting seeds, it may be worth exploring alternative sprouting methods. Some methods, such as growing sprouts hydroponically or using an automated sprouting system, can offer better control over the growing environment and reduce the risk of mould growth.
Choosing high-quality seeds
Buy from reputable suppliers
To ensure high-quality seeds, it is best to buy from reputable suppliers. Look for suppliers who have a track record of providing reliable and healthy seeds. Check for reviews and recommendations from other gardeners or sprout enthusiasts to ensure you are purchasing from a trustworthy source.
Check for proper storage conditions
Proper storage conditions play a crucial role in maintaining seed quality. When purchasing seeds, inquire about the storage conditions they were kept in. Seeds should be stored in a cool, dry, and dark environment to minimize the risk of mould contamination.
Look for certified organic seeds
Choosing certified organic seeds can provide an added level of assurance in terms of seed quality. Organic seeds are typically grown without the use of synthetic chemicals or pesticides, which can reduce the risk of mould contamination. Look for seeds that have been certified by recognized organic certification bodies.

Ensuring proper ventilation
Use mesh or perforated lids
To ensure proper ventilation during the sprouting process, use mesh or perforated lids for sprouting containers. These lids allow for airflow while still protecting the sprouts from dust or pests. Make sure the mesh or perforations are small enough to prevent any seeds from falling out.
Maintain adequate airflow
Maintaining adequate airflow throughout the sprouting area is essential. Place the sprouting containers in a well-ventilated location or use fans to promote air circulation. Proper airflow helps prevent the accumulation of excessive moisture, which can lead to mould growth.
Avoid overcrowding sprouting containers
Avoid overcrowding the sprouting containers, as this can impede proper airflow and increase the risk of mould growth. Adequate spacing between the sprouts allows for better ventilation and helps to prevent the transfer of mould spores between seeds.
Managing humidity levels
Use a hygrometer to measure humidity
Using a hygrometer can help you accurately measure the humidity levels in the sprouting area. This device will give you real-time information about the moisture content in the air and allow you to take necessary steps to adjust humidity levels accordingly.
Adjust humidity using a dehumidifier or humidifier
If the humidity is too high in the sprouting area, consider using a dehumidifier to remove excess moisture from the air. On the other hand, if the humidity is too low, a humidifier can help increase moisture levels. Maintaining optimal humidity levels will help prevent mould growth during the sprouting process.
Avoid sprouting seeds in high humidity areas
Avoid sprouting seeds in areas with naturally high humidity levels, such as bathrooms or basements. These environments already have elevated moisture levels, making them more prone to mould growth. Choose a well-ventilated and relatively dry area for sprouting to minimize the risk of mouldy sprouts.

Rinsing and draining properly
Rinse seeds thoroughly before sprouting
Thoroughly rinsing the seeds before the sprouting process removes any surface contaminants and mould spores, reducing the risk of mould growth. Rinse the seeds under clean, running water, gently agitating them to ensure thorough cleaning.
Drain excess water completely
After rinsing the seeds, make sure to drain off any excess water completely. Inadequate drainage can lead to stagnant water, which promotes the growth of mould. Proper drainage helps maintain the ideal moisture levels for sprouting without providing a breeding ground for mould.
Follow recommended soaking and rinsing periods
Different seeds require specific soaking and rinsing periods to initiate sprouting successfully. It is essential to follow the recommended soaking and rinsing instructions for the specific type of seed you are sprouting. These instructions help optimize the sprouting process while minimizing the risk of mould formation.
Using clean water
Use filtered or purified water
Using filtered or purified water helps ensure that the sprouts are not exposed to any potentially harmful contaminants. Filtered water removes impurities, including mould spores, chlorine, and other chemicals that may be present in tap water. Investing in a reliable water filtration system can significantly improve the quality of water used for sprouting seeds.
Boil water to kill any potential contaminants
If filtered or purified water is not readily available, boiling water can effectively kill any potential contaminants, including mould spores. Let the water cool before using it for sprouting to avoid damaging the seeds with high temperatures.
Avoid using chlorinated water
Chlorine, commonly found in tap water, can negatively affect the sprouting process and promote the growth of mould. Avoid using chlorinated water when sprouting seeds. If your tap water is chlorinated, let it sit uncovered for a few hours to allow the chlorine to dissipate before using it for sprouting.
Conclusion
By understanding the causes of mouldy sprouting seeds and implementing preventive measures, you can greatly reduce the risk of mould contamination and enjoy healthy sprouts. Choosing high-quality seeds, ensuring proper ventilation, managing humidity levels, rinsing and draining properly, using clean water, and inspecting seeds for damage or infection are all important steps to prevent mouldy sprouting seeds. Additionally, recognizing the signs of mouldy sprouting seeds and understanding the potential effects of consuming them will enable you to take prompt action if contamination occurs. Ultimately, with proper care and attention, you can enjoy the benefits of fresh and nutritious sprouts while minimizing the risk of mould-related issues.