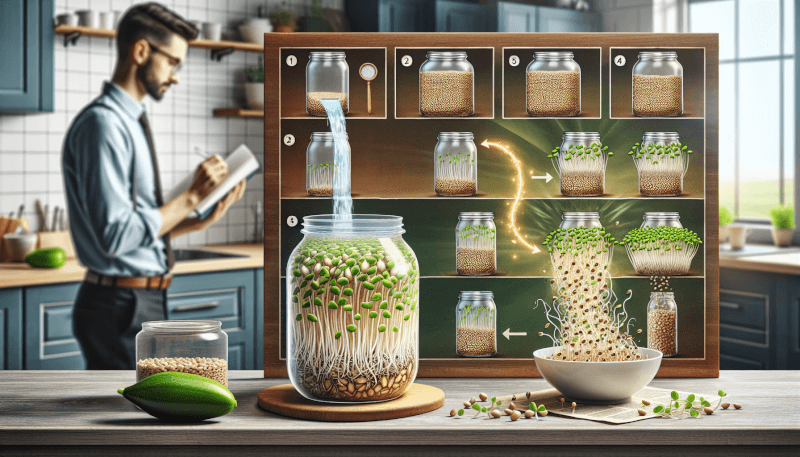
Do you have an interest in growing your own sprouts for a healthy addition to your daily meals? Look no further than the Sprouting Seeds Jar Method! This simple and effective technique allows you to easily sprout a variety of seeds right in the comfort of your own kitchen. With just a few easy steps, you can unleash the power of nature and watch as these tiny seeds transform into vibrant and nutritious sprouts. Get ready to embark on a journey of flavor and freshness as we guide you through the sprouting seeds jar method.
What is the Sprouting Seeds Jar Method?
Definition
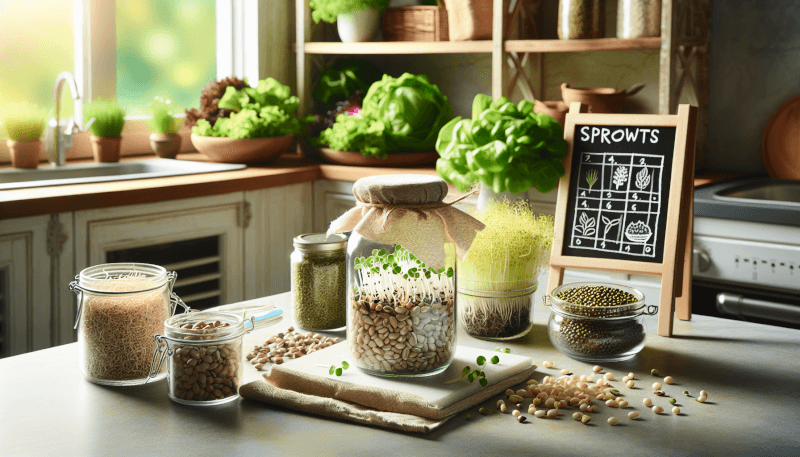
The sprouting seeds jar method is a simple and popular technique used to grow sprouts at home. It involves sprouting seeds in a jar, allowing them to germinate and develop into edible sprouts. This method is easy to execute and requires minimal space, making it accessible to anyone interested in growing fresh and nutritious sprouts.
Benefits
The sprouting seeds jar method offers several benefits for home gardeners and health-conscious individuals. Firstly, it provides a cost-effective way to access fresh and organic sprouts year-round. Sprouts are packed with essential nutrients, including vitamins, minerals, and enzymes, which can contribute to a healthy diet. Secondly, sprouting seeds at home allows you to have control over the growing process, ensuring the quality and safety of your sprouts. Additionally, it is a fun and rewarding activity that can be enjoyed by people of all ages.
How it Works
The sprouting seeds jar method creates an ideal environment for seeds to germinate and grow into sprouts. By soaking the seeds and providing them with water, warmth, and air, you can mimic the conditions necessary for germination. The process involves selecting appropriate seeds, preparing the jar, soaking the seeds, rinsing them regularly, and providing the right sprouting conditions. With proper care and attention, you can witness the magic of seeds sprouting and enjoy the fresh taste of homegrown sprouts.
Choosing Seeds for Sprouting
Considerations
When choosing seeds for sprouting, there are several factors to consider. Firstly, ensure that the seeds you select are labeled as suitable for sprouting. Not all seeds are suitable for this purpose, as some may be treated with chemicals or have low viability for germination. Secondly, consider the taste and texture of the sprouts you desire. Different seeds produce sprouts with varying flavors and textures, so choose seeds that align with your preferences. Lastly, consider the climate and season. Some seeds are better suited for sprouting indoors, while others thrive in outdoor conditions.
Popular Sprouting Seeds
There is a wide variety of seeds that can be used for sprouting, each offering unique flavors and nutritional profiles. Some popular sprouting seeds include alfalfa, broccoli, radish, mung bean, lentil, and sunflower. Alfalfa sprouts have a mild and nutty flavor, while broccoli sprouts add a delicious crunch to salads. Radish sprouts provide a peppery kick, and mung bean sprouts are commonly used in Asian cuisine. Lentil sprouts are rich in protein, and the green leaves of sunflower sprouts offer a refreshing taste.
Seeds to Avoid
While there are many seeds suitable for sprouting, there are also some seeds that are not recommended. Seeds that are toxic or have a bitter taste when sprouted should be avoided. Examples include tomato, eggplant, rhubarb, and potato seeds. Additionally, seeds that have been chemically treated or are past their expiry date should not be used for sprouting. It is important to prioritize safety and choose seeds that are specifically intended for sprouting purposes to ensure a successful and enjoyable sprouting experience.
Preparing the Sprouting Seeds Jar
Selecting a Jar
Selecting the right jar is an important step in the sprouting seeds jar method. Choose a jar that is wide-mouthed and made of a suitable material such as glass or BPA-free plastic. The wide mouth allows for easy rinsing and drainage, and transparent materials enable you to monitor the sprouting progress. It is also important to choose a jar size that corresponds to the amount of sprouts you intend to grow, keeping in mind that sprouts increase in volume as they grow.
Cleaning and Sterilizing
Before using a jar for sprouting, it is crucial to clean and sterilize it to prevent the growth of harmful bacteria. Wash the jar with mild soap and warm water, ensuring that all residue is removed. Alternatively, you can sterilize the jar by washing it with a solution of one part vinegar to three parts water. Rinse the jar thoroughly after cleaning or sterilizing to remove any soap or vinegar residue.
Choosing the Right Lid
The lid of the sprouting seeds jar should allow for proper drainage and air circulation while preventing dust or insects from entering. A suitable lid option is a mesh or screen lid that allows water to drain out easily while keeping the seeds inside. Alternatively, you can use a piece of cheesecloth secured to the jar with a rubber band. Avoid using airtight lids as they can cause mold or bacterial growth due to lack of ventilation.
The Soaking Process
Seed Quantity
The quantity of seeds to soak depends on the sprout yield you desire and the size of your jar. As a general guideline, start with approximately one tablespoon of small seeds or two tablespoons of larger seeds for a quart-sized jar. Adjust the seed quantity based on personal preference and experience. It is better to slightly underestimate the amount of seeds initially as they expand in volume during the soaking and sprouting process.
Water Temperature
The water temperature for soaking seeds is an important factor in promoting successful germination. Most seeds prefer water at room temperature, around 68-72°F (20-22°C). Avoid using cold water from the refrigerator as it can slow down the soaking process. If you live in a warm climate, you can use slightly cooler water to compensate for the higher ambient temperature.
Soaking Time
The soaking time for seeds varies depending on the type of seed and personal preference. In general, most seeds require an initial soaking period of 8-12 hours. However, some seeds like mung beans or lentils may require a shorter soaking time of 4-6 hours. After the initial soak, drain the water and rinse the seeds thoroughly before beginning the sprouting process.
The Rinsing Method
Frequency of Rinsing
Rinsing is a crucial step in the sprouting process as it ensures the seeds remain hydrated and prevents the formation of mold or bacterial growth. The frequency of rinsing depends on the climate, seed type, and personal preference. As a general guideline, rinse the seeds at least twice a day, preferably in the morning and evening. In hot or dry conditions, an additional rinse may be necessary to maintain adequate moisture levels.
Proper Rinsing Technique
To rinse the sprouting seeds, pour clean water into the jar, fill it about halfway, and gently swirl the seeds around. This helps to dislodge any debris or husks that may have accumulated. Pour out the water, ensuring complete drainage, and repeat the process until the water runs clear. It is important to maintain a gentle touch to avoid damaging the delicate sprouts.
Drainage and Air Circulation
After rinsing, ensure that the jar is properly drained to prevent excess moisture, which can lead to undesirable mold growth. Invert the jar at an angle, using a dish rack or elevated surface, to allow the excess water to drain out. Additionally, proper air circulation is essential for healthy sprouting. Position the jar in a way that allows airflow while maintaining the desired sprouting conditions.
Sprouting Conditions
Temperature
Maintaining the right temperature is crucial for successful sprouting. Most seeds thrive in temperatures between 65-75°F (18-24°C). Find a suitable location in your home where the temperature remains relatively consistent within this range. Avoid areas that are too cold or too hot, such as near direct sunlight or drafty windows. Keeping the sprouting jar away from temperature fluctuations will help promote optimal sprout growth.
Light
While some sprouts benefit from exposure to light, others prefer darkness during the sprouting process. As a general rule, sprouts such as alfalfa, broccoli, and mung bean require indirect sunlight for a few hours a day, while others, like lentil or radish sprouts, can sprout in darkness. Observe the specific requirements of the seeds you are sprouting and position the jar accordingly to provide the appropriate lighting conditions.
Humidity
Maintaining proper humidity levels is essential for successful sprouting. You can create a humid environment by loosely covering the sprouting jar with a damp cloth or placing it in a tray with water. This allows for evaporation and helps to maintain humidity. However, it is important to avoid excessive moisture, as it can lead to mold or fungal growth. Monitor the moisture levels regularly and make adjustments as needed to create an ideal sprouting environment.

Monitoring Sprouting Progress
Checking for Germination
To ensure that your seeds are sprouting and progressing as expected, regularly check for signs of germination. After a few days of soaking and rinsing, you should start to see tiny sprouts emerging from the seeds. The sprouts will continue to grow longer over the next few days. If you notice any seeds that have not sprouted after a reasonable amount of time, they may be non-viable and can be discarded.
Identifying Potential Issues
Monitoring the sprouting progress also involves keeping an eye out for any issues or abnormalities. Discoloration, foul odors, or excessive sliminess may indicate mold or bacterial growth, which can compromise the quality and safety of the sprouts. If you notice any such signs, it is important to discard the entire batch and start the process again using new seeds.
Common Mistakes to Avoid
While sprouting seeds using the jar method is relatively straightforward, there are common mistakes that can hinder successful sprouting. It is important to avoid over-soaking the seeds, as this can lead to rot or fungal growth. Similarly, inadequate rinsing or stagnant water can create an environment for bacterial growth. Additionally, not providing enough drainage or air circulation can cause sprouts to become soggy or stunted. Paying attention to these common mistakes can help ensure a successful sprouting experience.
Harvesting Your Sprouts
Determining Readiness
Sprouts are typically ready for harvest when they have reached their desired length and have developed their first set of true leaves. The length of time required for sprouting varies depending on the seed type and growing conditions. As a general guideline, most sprouts are ready for harvest within 4-7 days. However, some seeds like sunflower or pea shoots may require longer growing times. Taste a few sprouts to determine if they have reached the desired flavor and texture before harvesting the entire batch.
Harvesting Techniques
To harvest your sprouts, gently pour them into a large bowl or colander. Sort through the sprouts, removing any seed husks or ungerminated seeds. Rinse the sprouts thoroughly under cold running water to remove any residual hulls. Allow the sprouts to drain completely before transferring them to a storage container. It is important to handle the sprouts gently to avoid damaging the delicate leaves.
Storing and Using Sprouts
Freshly harvested sprouts can be stored in a sealed container in the refrigerator for up to a week. To maximize their shelf life, lightly dampen a paper towel and place it at the bottom of the container to maintain humidity. Avoid washing the sprouts until just before use to prevent excess moisture. Incorporate sprouts into salads, sandwiches, wraps, stir-fries, or smoothies for an added crunch and nutritional boost.
Troubleshooting Sprouting Problems
Mold or Bacterial Growth
Mold or bacterial growth is a common issue when sprouting seeds. To prevent this, ensure that the sprouting jar is properly cleaned and sterilized before use. Additionally, maintain proper drainage and adequate air circulation during the sprouting process. If mold or bacterial growth occurs, discard the entire batch of sprouts and thoroughly clean and sterilize the jar before starting a new batch.
Seed Rot
Seed rot can occur if the seeds are over-soaked or if the sprouting conditions are too wet or humid. To prevent seed rot, avoid soaking seeds for prolonged periods and ensure that excess water is properly drained. Adjust the sprouting conditions as needed to maintain proper moisture levels. If seed rot appears, it is best to discard the affected seeds and rinse the remaining sprouts thoroughly before consuming.
Sluggish or Slow Sprouting
If your seeds are sprouting at a slower rate than anticipated, there may be several factors contributing to the sluggish growth. Ensure that the seeds are fresh and have not exceeded their expiry date. Additionally, verify that the sprouting conditions, including temperature and humidity, are within the optimal range for the specific seed type. Adjusting these factors and providing consistent care can help promote faster and healthier sprouting.
Safety Considerations
Food Safety Guidelines
Following food safety guidelines is essential when sprouting seeds at home. Purchase seeds from reputable sources that specifically label them for sprouting purposes. Always use clean and sterilized jars, and wash your hands thoroughly before handling seeds or sprouts. Keep sprouts refrigerated and consume them within the recommended time frame to minimize the risk of bacterial contamination. If you have a compromised immune system, it is advisable to consult a healthcare professional before consuming raw sprouts.
Proper Hygiene Practices
Maintaining proper hygiene practices throughout the sprouting process is crucial to prevent the spread of bacteria or contaminants. Wash your hands thoroughly with soap and water before handling seeds or sprouts. Ensure that all equipment used, including jars, lids, and utensils, are properly cleaned and sanitized. Regularly clean the sprouting area to avoid cross-contamination. By practicing good hygiene, you can reduce the risk of foodborne illnesses and enjoy safe and nutritious sprouts.
In conclusion, the sprouting seeds jar method is a simple and rewarding way to grow fresh and nutritious sprouts at home. By selecting the right seeds, preparing the jar and following the soaking, rinsing, and sprouting process correctly, you can enjoy a bountiful harvest of delicious and healthy sprouts. With attention to proper sprouting conditions, regular monitoring, and adherence to safety guidelines, you can confidently embark on your sprouting adventure and reap the benefits of this sustainable and nutritious practice. Happy sprouting!
